
If you’re looking for a profitable side hustle or a way to expand your product offerings on platforms like Etsy or Shopify, sublimation printing is a fantastic option. It allows you to create custom, personalized products that customers love—like mugs, mouse pads, and photo frames.
In this post, I’ll walk you through how I use an Adobe Photoshop template to create custom mugs for my clients. Whether you’re new to sublimation or looking to streamline your workflow, this guide will help you get started!
Why Sell Custom Sublimated Mugs?
Selling custom mugs is a great way to stand out in the e-commerce space. Customers love personalized gifts for birthdays, holidays, and special occasions. Plus, they’re willing to pay a premium price for products that feature their own images, text, or designs.
By using Photoshop templates, you can quickly and efficiently create custom designs that are easy to edit, print, and press onto mugs. Let’s dive into the process!
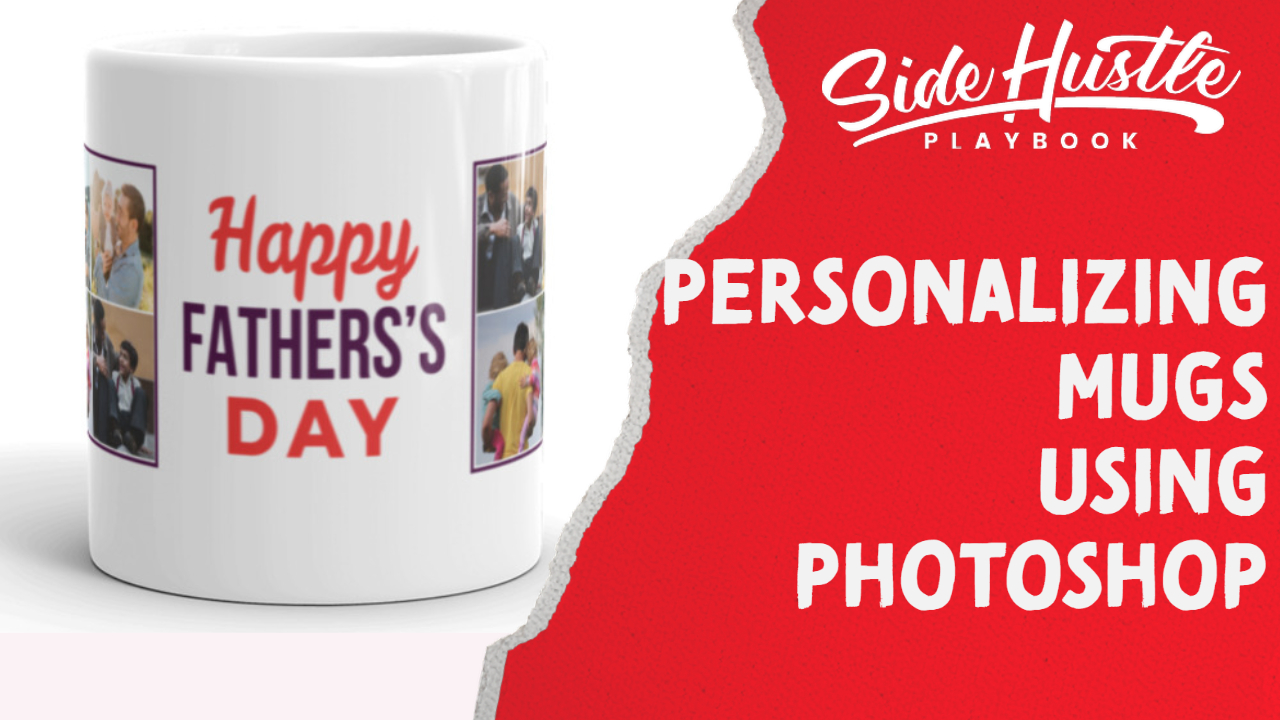
Step 1: Using a Photoshop Template for Mugs
When selling custom sublimation products, having a template is a game changer. I personally use Adobe Photoshop to create my designs, but you can also use tools like Canva or other design software.
Most mug manufacturers provide pre-sized template files for their products. I use a 15oz mug template, but you can also create designs for 11oz mugs or other sizes.
If you’re interested, I’ll be sharing my Photoshop templates with you—check out the download link at the bottom of this post!
Step 2: Setting Up the Custom Design
Once I have my Photoshop template open, here’s how I customize it for each client:
- Upload the customer’s photos – Clients send me their images when they place an order.
- Replace the template images – In Photoshop, I simply drag and drop the new image into the correct layer.
- Resize and adjust – Some images need to be resized or repositioned to fit perfectly.
- Use a Clipping Mask – This keeps images inside the designated areas of the template.
- Save the design – Once everything looks good, I save the file and prepare it for printing.
This method allows for quick edits and adjustments, making it easy to handle multiple orders efficiently.
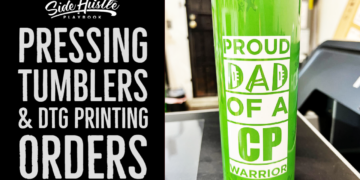
Step 3: Printing and Pressing the Mug
After designing the mug in Photoshop, the next step is printing and pressing:
- Print the design using a sublimation printer with sublimation ink.
- Press the design onto the mug using a heat press machine.
- Cool and package the mug for shipping.
Once pressed, the design becomes permanent, making it dishwasher and microwave-safe—something customers love!
Boosting Your Profits with Custom Mugs
One of the best things about custom sublimation products is that you can charge higher prices for personalized items. Customers love the ability to add their own images, names, or special messages.
Popular design ideas include:
🎁 Father’s Day & Mother’s Day mugs
🎂 Birthday & anniversary gifts
💼 Business branding & logo mugs
💖 Wedding & baby shower keepsakes
Adding different design variations can help attract a wider range of customers and increase your sales.
Free Photoshop Mug Templates – Download Now!
To help you get started, I’m sharing my 15oz and 11oz mug Photoshop templates for free! Just sign up for my newsletter, and I’ll send you the download link.
👉 Download the Free Templates Here (Link coming soon!)
I’ll also be sharing new templates and designs regularly, so make sure to subscribe for updates!
Final Thoughts
Sublimation printing is an excellent side hustle for anyone looking to sell custom products online. Using Photoshop templates makes the process fast and easy, helping you create high-quality, personalized mugs that customers will love.
If you found this tutorial helpful, be sure to check out more tips and guides on SideHustlePlaybook.biz.
💬 Have questions? Drop a comment below!
And don’t forget to follow me on YouTube for more tutorials on sublimation, print-on-demand, and side hustle strategies.
🚀 Let’s build something great together!


