
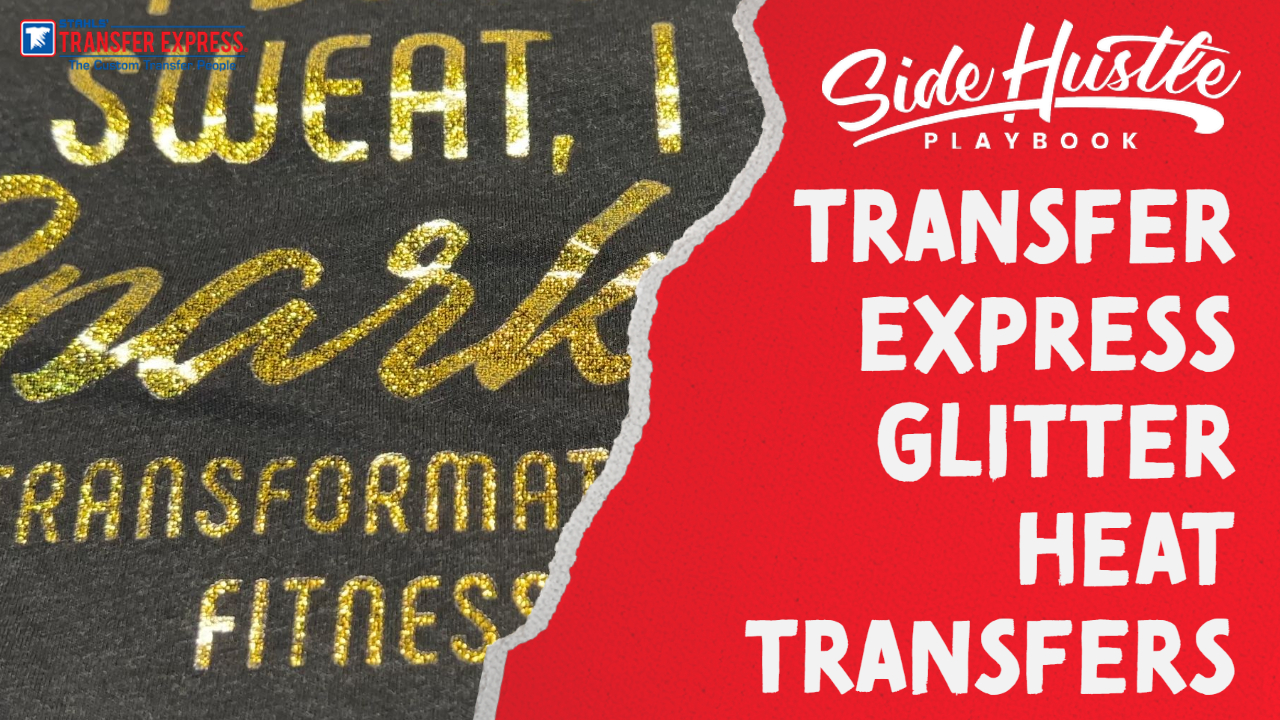
When it comes to custom t-shirts, adding a little sparkle can go a long way—especially for parents supporting their kids’ sports teams. Glitter heat transfers are a great way to make designs pop, but how well do they actually hold up? In this post, I’m testing out glitter heat transfers from Heat Transfers Express to see if they’re a good option for custom shirts.
Why Consider Glitter Heat Transfers?
Springtime is a big season for youth sports like baseball, soccer, and other activities. While many people focus on creating custom shirts for the players, there’s also a great opportunity in designing shirts for parents and family members. From experience, glitter and shiny designs tend to be very popular with moms cheering from the stands. If these transfers work well, they could be a great addition to any custom apparel business.
Bulk Ordering & Ganging Sheets for Efficiency
One thing to consider when working with heat transfers is cost-effectiveness. Bulk orders are always the way to go since it’s significantly cheaper to order transfers in larger quantities. Additionally, you can “gang” your designs—meaning you fit multiple designs onto one transfer sheet to maximize its use. This is a great strategy to save money and get the most out of each order.
The Application Process
For this test, I followed the recommended application settings:
- Temperature: 365°F
- Press Time: 15 seconds
- Pressure: Medium (set to 6–8 on the Stahls’ heat press)
- Peel Method: Cold peel (must cool completely before peeling)
Using a Bella+Canvas shirt, I started with a quick pre-press to remove moisture, then applied the transfer. After pressing for 15 seconds, I set the shirt aside to cool before peeling.
First Attempt Results
The larger portions of the design adhered well, but the smaller elements—like tiny stars—had some peeling issues. It wasn’t clear whether the problem was due to pressure, cooling time, or the nature of the sample transfer. Since some details didn’t transfer cleanly, I decided to conduct a second test.
Second Attempt: Adjusting for Better Results
For the second test, I made two key adjustments:
- Lowered the pressure slightly (from 8 to 7)
- Let the shirt cool for 30 minutes before peeling
Even with these changes, the larger design elements looked great, but the smaller details still had minor peeling issues. To troubleshoot, I plan to reach out to Heat Transfers Express for recommendations on optimizing the process.
Final Thoughts
Overall, I like the quality of the glitter transfers—especially for larger text and designs. The glitter has a smooth finish, meaning it doesn’t shed or rub off, which is a huge plus. However, the issues with fine details mean I’m not quite ready to offer these for sale just yet. Before making a bulk order, I’ll do more testing and seek advice from the manufacturer.
If you’re considering using glitter heat transfers, I highly recommend testing them first to ensure they meet your quality standards. Always experiment before fulfilling customer orders—it can save you a lot of headaches in the long run!
Stay Updated!
I’ll be sharing updates on this test in future videos and blog posts. If you’re interested in more t-shirt printing tips, check out my blog at Side Hustle Playbook.
Have you tried glitter heat transfers? Let me know in the comments what worked for you!


